
Every motorcycle enthusiast knows that maintaining a clean and polished bike is essential for both aesthetics and performance. A well-kept motorcycle not only looks great but also contributes to its longevity and optimal functionality. In this article, we will explore the best practices for cleaning and detailing your motorcycle, ensuring that it remains in top condition year-round.
The process of cleaning and detailing your motorcycle goes beyond a simple wash. It involves a series of meticulous steps that address various components of your bike. From the frame and wheels to the engine and bodywork, each area requires specific products and techniques to achieve the best results. By adhering to these recommendations, you’ll not only maintain your motorcycle’s appearance but also help prevent corrosion and damage from dirt and grime.
In addition to traditional cleaning methods, utilizing the right tools and products can make a significant difference. Whether you’re a seasoned rider or a newcomer, understanding these cleaning and detailing tips will empower you to take better care of your motorcycle. Let’s dive into the essential steps that will keep your ride looking fresh and performing at its best.
Choosing the Right Cleaning Products for Your Motorcycle
Selecting the appropriate cleaning products for your motorcycle is crucial to maintaining its appearance and ensuring that it functions properly. The right products can remove dirt, grease, and grime without damaging sensitive surfaces. Start by identifying the different areas of your motorcycle that require specific care, such as the paint, chrome, wheels, and leather components.
For painted surfaces, use a pH-balanced motorcycle-specific cleaner. These formulas lift dirt without stripping away wax or damaging clear coats. Avoid household cleaners, as they may contain harsh chemicals that can harm the finish. Additionally, consider using a good quality wax or sealant after cleaning to protect the paint from environmental damage.
Chrome parts require a dedicated chrome cleaner that effectively removes oxidation and tarnish. Look for products that are designed specifically for chrome surfaces to prevent scratching. After cleaning, apply a chrome polish to enhance shine and provide a protective barrier against rust.
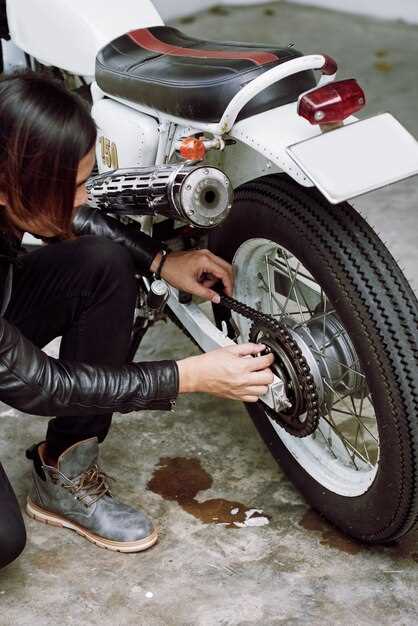
Wheels can accumulate brake dust and road grime, so selecting a dedicated wheel cleaner is essential. Opt for non-acidic, biodegradable options that are safe for all wheel finishes. Use a wheel brush for hard-to-reach areas, and always rinse thoroughly to remove any residue.
For leather components, such as seats and saddlebags, a gentle leather cleaner is recommended. Avoid harsh detergents and instead choose products that condition the leather while cleaning. Always follow up with a leather conditioner to keep the material supple and prevent cracking.
It’s also important to check for compatibility with any finishes on your motorcycle. Always read product labels and choose biodegradable options when possible to minimize environmental impact. Ultimately, investing in quality cleaning products will help preserve the beauty and longevity of your motorcycle while ensuring an enjoyable riding experience.
Step-by-Step Guide to Properly Wash Your Motorcycle

Washing your motorcycle not only enhances its appearance but also prolongs its lifespan. Follow these steps for an effective washing process.
Step 1: Gather Your Supplies
Before starting, collect all necessary supplies. You will need a bucket, mild motorcycle-specific soap, a soft sponge or wash mitt, a microfiber cloth, a hose with a spray nozzle, and detailing brushes for hard-to-reach areas. Ensure you have a designated space away from direct sunlight to avoid water spots.
Step 2: Rinse the Motorcycle
Use a hose with a spray nozzle to rinse your motorcycle thoroughly. Start from the top and work your way down. This will remove loose dirt and debris and prepare the surface for washing. Be cautious around sensitive areas like the electrical components and brakes.
Step 3: Prepare Soapy Water
Fill a bucket with water and add a small amount of motorcycle-safe soap according to the manufacturer’s instructions. Mix it well to create a soapy solution that is gentle yet effective.
Step 4: Wash the Motorcycle
Dip your sponge or wash mitt into the soapy water and start washing the motorcycle from the top down. Pay special attention to areas that collect dirt, such as the wheels, engine, and undercarriage. Use soft, circular motions to avoid scratching the surface. Rinse the sponge frequently to prevent dirt from causing swirl marks.
Step 5: Clean the Wheels and Tires
Use a separate brush or sponge to clean the wheels and tires, as these areas often accumulate grime. Apply extra soap as needed and ensure you get into the crevices. Rinse thoroughly with water afterward.
Step 6: Rinse Off the Soap
After washing, rinse the entire motorcycle again with a hose. Start from the top and move down, ensuring that all soap is removed completely. Any remaining soap can leave residue or streaks on the paint.
Step 7: Dry the Motorcycle
Use a clean, dry microfiber cloth to gently dry the motorcycle. Start with larger surfaces and move to smaller areas. This will help avoid water spots and maintain a clean finish.
Step 8: Apply Wax or Polish (Optional)
If you want to provide additional protection and shine, consider applying a layer of motorcycle-specific wax or polish. Follow the product instructions and use a separate clean cloth to apply and buff the wax.
Step 9: Final Touches
Inspect your motorcycle for any missed spots. You can also clean the mirrors, windshields, and other surfaces with appropriate cleaners to enhance visibility and clarity.
Step 10: Maintenance
To keep your motorcycle looking its best, establish a regular washing routine and address grime as it accumulates. Perform quick clean-ups after rides to minimize dirt buildup.
Techniques for Detailing Your Motorcycle for a Showroom Shine

Achieving a showroom shine on your motorcycle involves a combination of meticulous cleaning, polishing, and protection techniques. Begin with a thorough wash using a high-quality motorcycle-specific soap. Use a soft sponge or microfiber cloth to avoid scratching the paint. Pay special attention to the crevices and hard-to-reach areas where dirt tends to accumulate.
After washing, rinse your motorcycle with clean water, ensuring all soap is removed. It’s advisable to do this in a shaded area to prevent water spots. Once rinsed, dry the motorcycle using a microfiber towel, which helps to absorb moisture effectively and reduces the risk of scratches.
Next, inspect the paint for imperfections such as swirls or scratches. Utilize a clay bar to remove embedded contaminants that washing alone may miss. Glide the clay bar over a lubricated surface to ensure a smooth application, and clean the area before moving on to polishing.
For polishing, select a quality polish designed for motorcycles. Apply it using an orbital buffer for uniform application, which can also save time and effort compared to manual polishing. Focus on sections at a time and buff until the surface appears glossy.
Once polished, protect the paint with a high-quality wax or sealant. This layer adds a protective shield against dust and environmental elements while enhancing shine. Apply the wax with a clean applicator pad and let it cure as per product instructions before buffing to a brilliant finish.
Don’t overlook other parts of the motorcycle. Treat chrome components with a dedicated chrome cleaner or polish to prevent oxidation and tarnishing. Clean the wheels with a wheel cleaner that’s safe for your specific type, ensuring they are free from brake dust and grime.
Lastly, condition your leather seat and controls with appropriate leather care products. This will not only enhance the appearance but also prolong the life of the leather. Regular maintenance and detailing will ensure your motorcycle retains that showroom shine for years to come.


