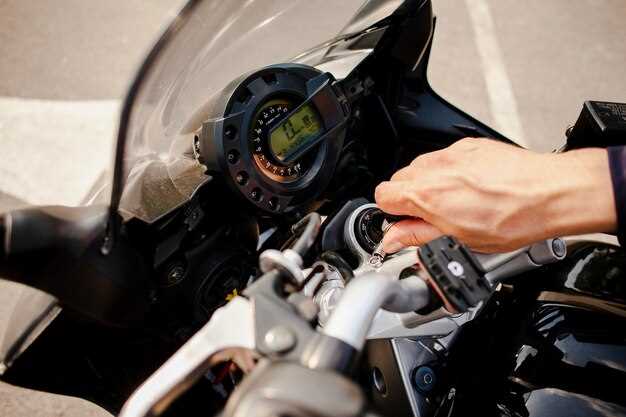

If your motorcycle refuses to start, it can be both frustrating and concerning. A reliable ride is essential for any motorcycle enthusiast, and understanding the potential issues is crucial to getting back on the road. This guide aims to provide a systematic approach to diagnosing and resolving common starting problems.
The first step in troubleshooting a non-starting motorcycle is to assess the basic components. Many issues arise from the battery, fuel system, or ignition system. A methodical examination of these elements will help to identify the root cause. Battery health is often the most common culprit; a dead or weak battery can prevent the engine from turning over. Checking for corrosion on terminals and ensuring that the battery is fully charged is vital.
Next, consider the fuel delivery system. Ensure that there is sufficient fuel in the tank and that the fuel petcock is open. If the motorcycle has been sitting for an extended period, the fuel may have degraded or clogged filters. Finally, examine the ignition system for issues such as faulty spark plugs or coils, which may prevent the engine from firing. A well-rounded understanding of these components will empower you to troubleshoot effectively and restore your motorcycle to a functional state.
Checking the Battery and Electrical System
To troubleshoot a motorcycle that fails to start, one of the primary areas to examine is the battery and electrical system. Start by checking the battery voltage using a multimeter. A healthy motorcycle battery should read between 12.4 and 12.7 volts when fully charged. If the reading is below 12.4 volts, the battery may be weak or discharged.
Next, inspect the battery terminals for corrosion. Clean any corrosion using a mixture of baking soda and water, applying it with a brush. Ensure that the terminals are tightly connected; loose connections can disrupt the flow of electricity, preventing the motorcycle from starting.
If the battery appears to be in good condition but the motorcycle still won’t start, perform a load test. This involves using a load tester to simulate engine starting conditions. If the battery fails this test, it may need replacing. If the battery is new or holds a charge, the issue may lie further in the electrical system.
Check the fuses and relays associated with the starting system. A blown fuse can interrupt the electrical circuit, so replace any damaged fuses with ones of the correct amperage. If a relay is clicking but not functioning, it may require replacement.
Next, inspect the wiring harness for frayed wires or damaged insulation, as these can create short circuits. Pay special attention to connectors, ensuring they are clean and free of moisture.
Lastly, verify that the ignition switch and kill switch are functioning properly. Faulty switches can prevent the electrical system from engaging. Use a multimeter to test continuity across these switches to ensure they are operational.
Inspecting the Fuel System for Blockages

When troubleshooting a motorcycle that fails to start, one common area to inspect is the fuel system. Blockages in the fuel system can prevent adequate fuel flow, leading to starting issues. Begin by checking the fuel tank; ensure there is sufficient fuel and that it is clean. Contaminated or stale fuel can clog lines and filters.
Next, examine the fuel lines for any signs of damage, kinks, or obstructions. Inspect the entire length of the hoses, from the tank to the carburetor or fuel injectors, and look for leaks or deterioration. If any sections appear compromised, replacing them is crucial to restore proper fuel flow.
After the fuel lines, focus on the fuel filter. Over time, filters can become clogged with debris, restricting fuel flow. Depending on the motorcycle model, this may be a replaceable part or built into the fuel pump assembly. If the filter appears dirty, replacing it can significantly improve fuel delivery.
For carbureted motorcycles, check the float bowl for obstructions. Remove the float bowl and inspect for any debris or varnish build-up that could impede fuel flow. Clean the bowl and jets with appropriate solvents if necessary. Additionally, ensure the float itself is functioning correctly, as a stuck float can prevent fuel from entering the carburetor.
If the motorcycle has a fuel injection system, you will need to check the injectors as well. Remove the injectors and use a cleaning kit to ensure that they are free of blockages. Testing their electrical connections can also help determine if they are receiving the correct signals to operate. A malfunctioning fuel injector will inhibit starting and requires replacement or professional cleaning.
Finally, inspect the fuel pump. Listen for any unusual noises when turning the key on, as a silent fuel pump might indicate failure. If necessary, perform pressure tests to determine the pump’s efficiency. A compromised pump can severely affect fuel delivery, leading to starting problems.
In conclusion, a thorough inspection of the fuel system is vital when diagnosing starting issues. By carefully checking the fuel tank, lines, filter, carburetor, injectors, and pump, you can identify and resolve blockages that may be hindering your motorcycle’s performance.
Evaluating the Ignition Components and Starter Motor

When a motorcycle fails to start, one of the primary areas to assess is the ignition system and starter motor. These components are crucial for initiating the combustion process and ensuring the engine turns over effectively.
1. Check the Battery Voltage
The first step is to inspect the battery. A low-voltage battery may not provide sufficient power to the ignition system. Use a multimeter to measure the voltage; it should read at least 12.6 volts for a fully charged battery. If the voltage is below 12.4 volts, consider recharging or replacing the battery. Additionally, verify that the battery terminals are clean and securely connected.
2. Inspect the Ignition Switch
The ignition switch enables the flow of current to the ignition system. Ensure the switch is functioning properly by checking for continuity with a multimeter when the switch is in the “on” position. If there is no continuity, the ignition switch may need to be replaced.
3. Examine the Spark Plugs
Spark plugs are essential for igniting the air-fuel mixture. Remove the spark plugs and inspect their condition. Look for carbon deposits, signs of wear, or damage. Clean or replace the spark plugs as necessary, ensuring they are properly gapped according to the manufacturer’s specifications.
4. Test the Ignition Coil
The ignition coil generates the high voltage needed to create a spark at the spark plugs. Use a multimeter to test the primary and secondary windings of the coil. A lack of continuity or an incorrect resistance reading can indicate a faulty coil that requires replacement.
5. Analyze the Starter Motor
If the ignition components are in good condition, focus on the starter motor next. Listen for any unusual sounds when attempting to start the motorcycle. A clicking noise may indicate a poor connection or a failing starter solenoid. Inspect the starter motor terminals for corrosion or loose connections.
6. Check the Starter Relay
The starter relay acts as a switch that sends power to the starter motor when the ignition key is turned. To test the relay, locate it and perform a continuity test using a multimeter. If the relay fails the test, it should be replaced to restore proper function.
7. Assess Wiring and Fuses
Inspect the wiring harness for signs of wear, damage, or loose connections. Pay particular attention to ground connections, as a poor ground can disrupt the electrical flow. Additionally, check the fuses related to the ignition and starter systems, replacing any that are blown.
By systematically evaluating the ignition components and starter motor, you can diagnose and resolve issues preventing your motorcycle from starting. Proper maintenance and timely repairs are essential to ensure reliable performance on the road.


